


As Heap’s Qualtrics owner, I get a lot of questions from CSMs and clients on how to integrate Heap and Qualtrics, so I wanted to share a few posts on this topic. This one will cover how to get Heap data into Qualtrics.
In the following posts, I will cover: how we get Heap data into Qualtrics in order to target surveys & ideas to report + analyze the data in Heap to understand how product behaviors influence your NPS score.
Objective:
- Send Qualtrics survey response data into Heap in order to provide the foundation for further segmentation & analysis in Heap
- Bring in the data to enable the NPS dashboard (see doc)
Gather/understand before you get started & you can complete config in about ~30 min:
- Your Heap App ID for the Environment where you’ll send this data
- The Identifier that you use as your users’ Heap Identity
- Access to create Qualtrics Workflows for your desired Qualtrics Project
- Know the survey questions in Qualtrics that you’ll want to sync into Heap
- Have the Heap Identity identifier available as Embedded Data within Qualtrics
- Quick understanding of the Heap Track API
Steps:
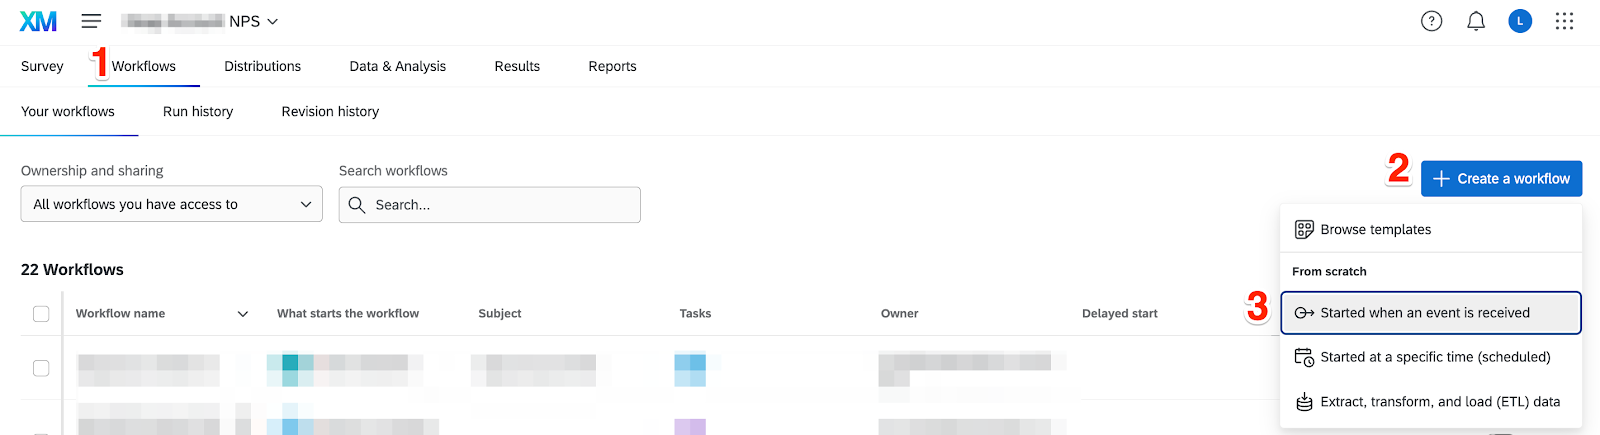
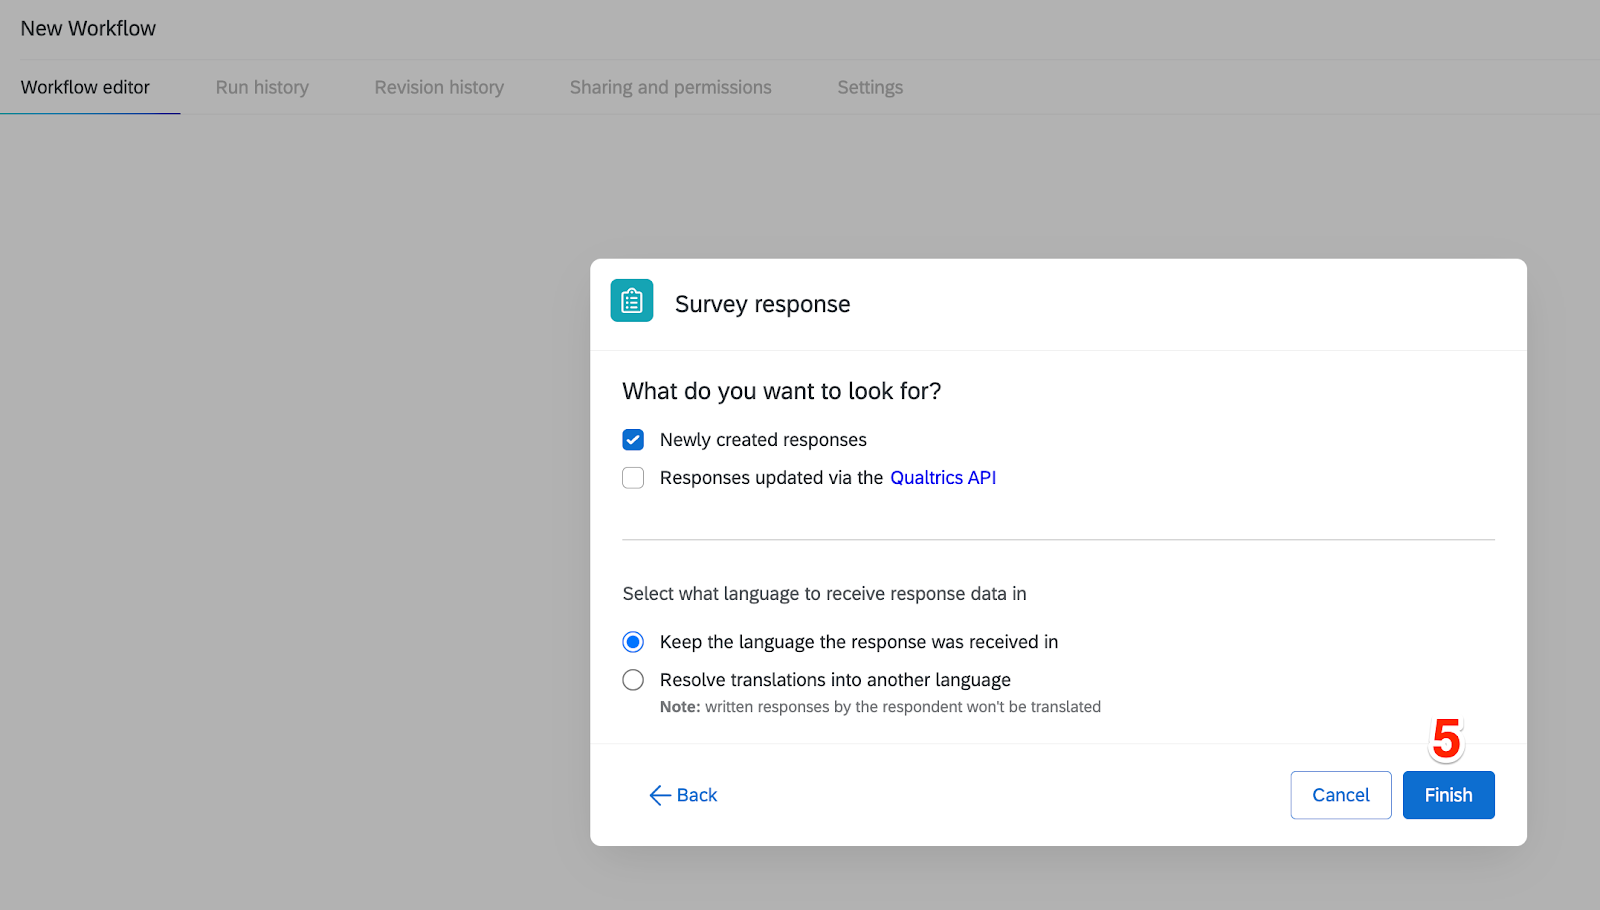
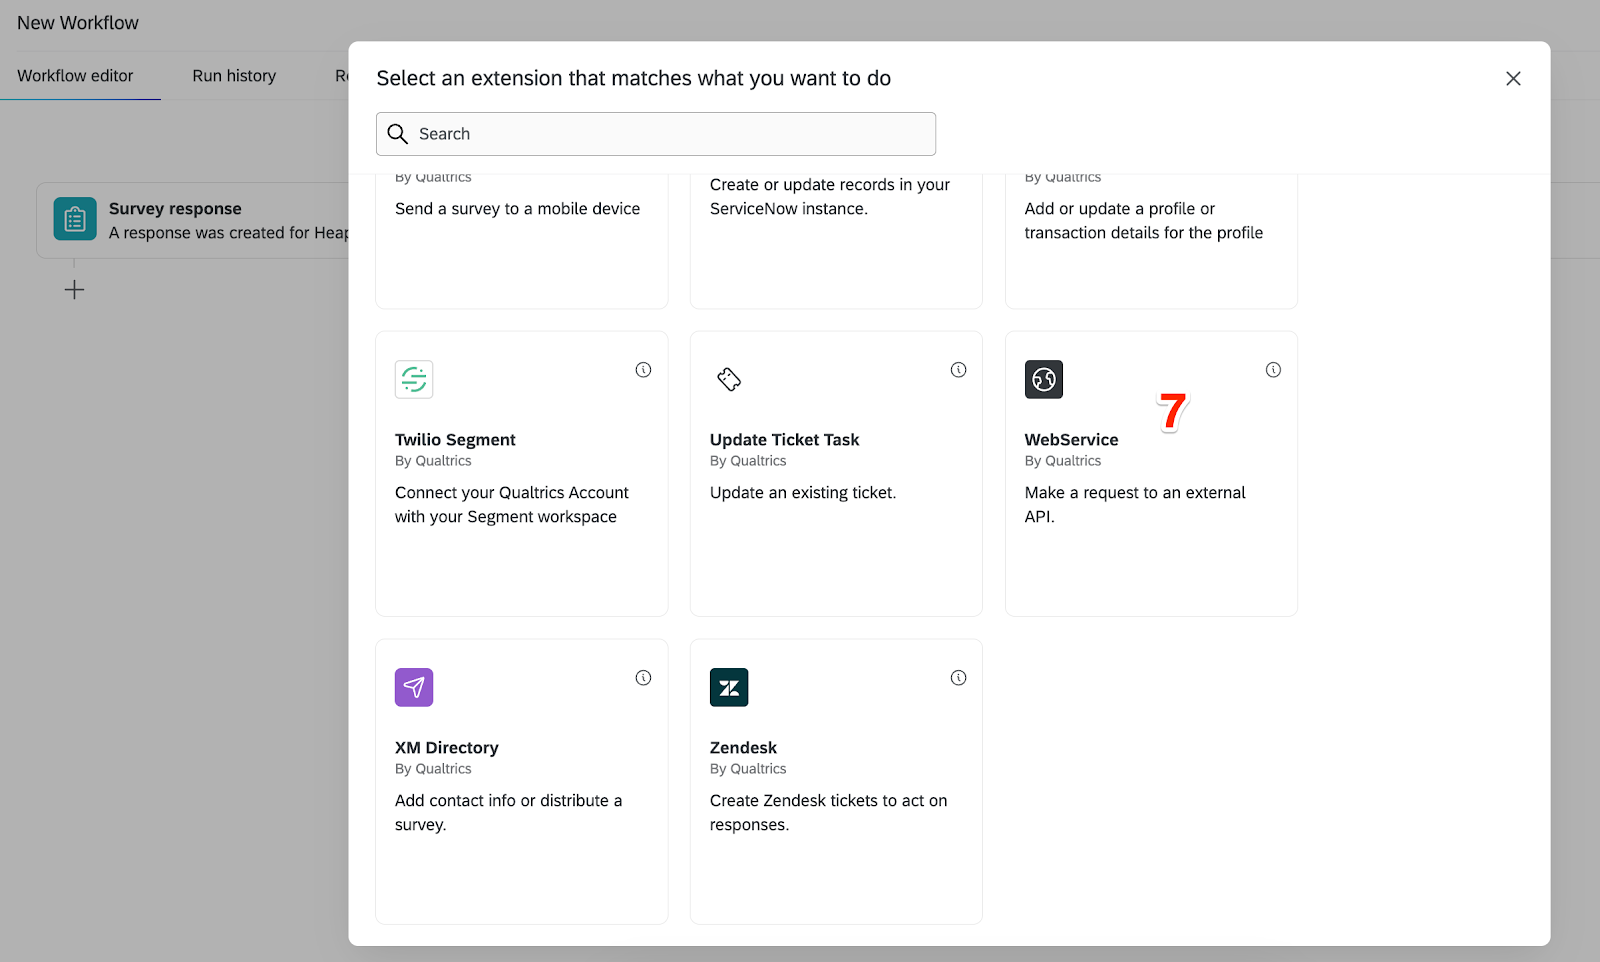
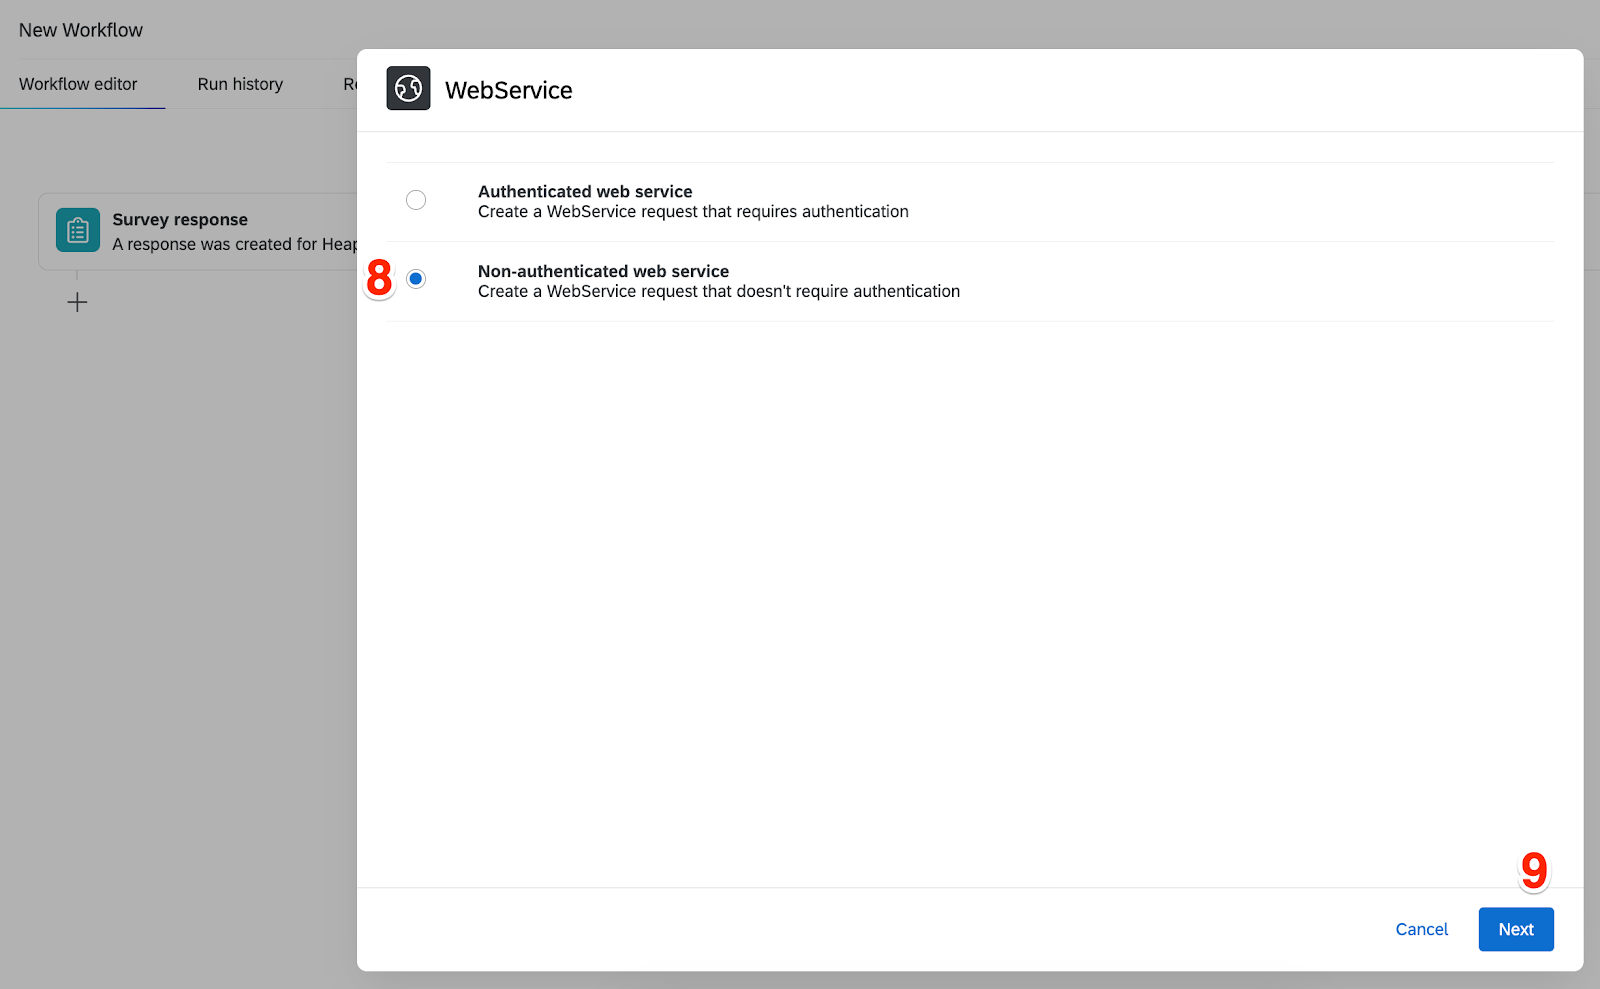
Within Qualtrics, go to your Project and then go to Workflows, create a workflow. Most people will want to trigger this event as soon as a survey response is received.


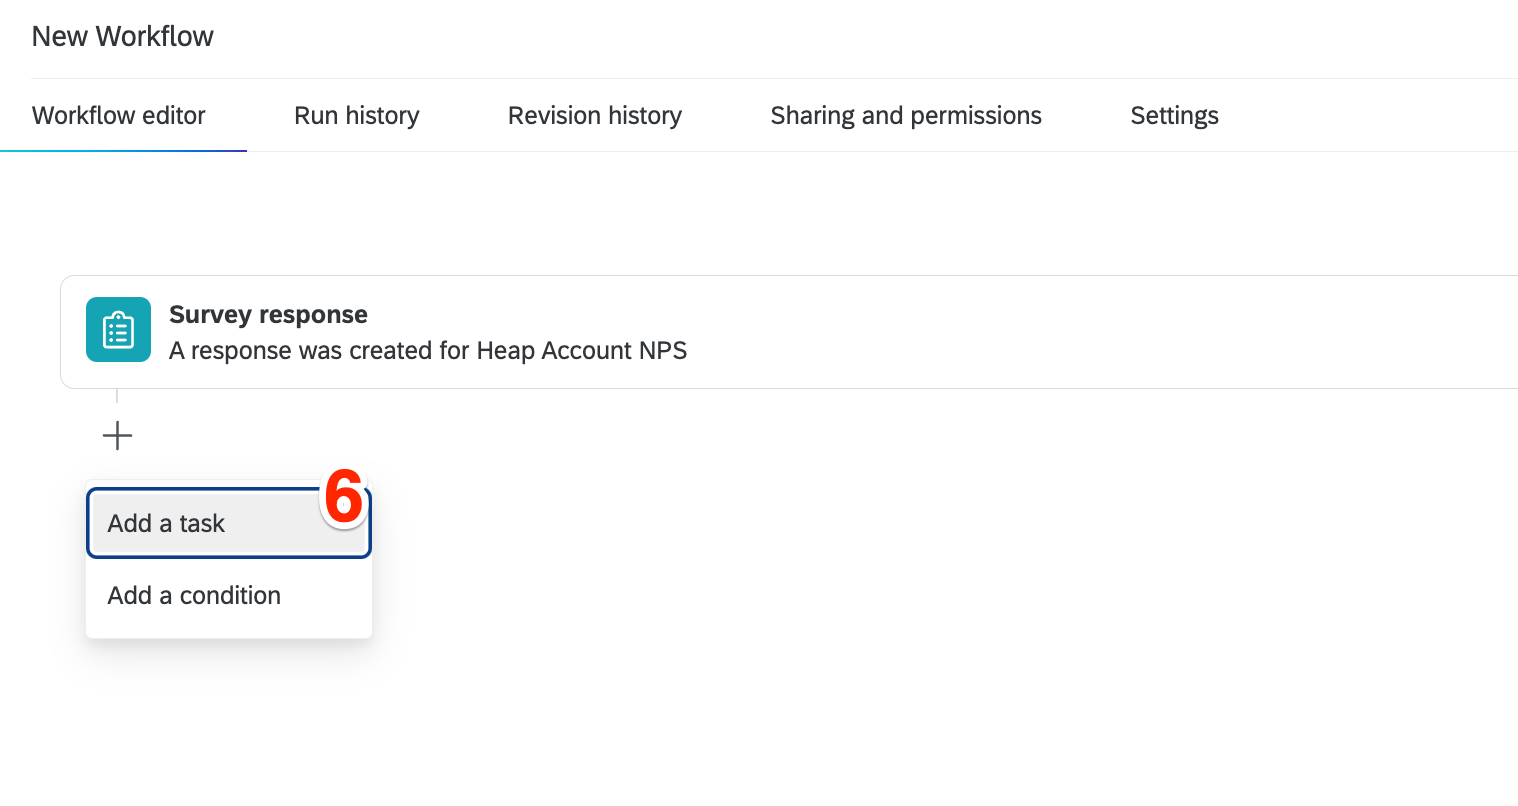


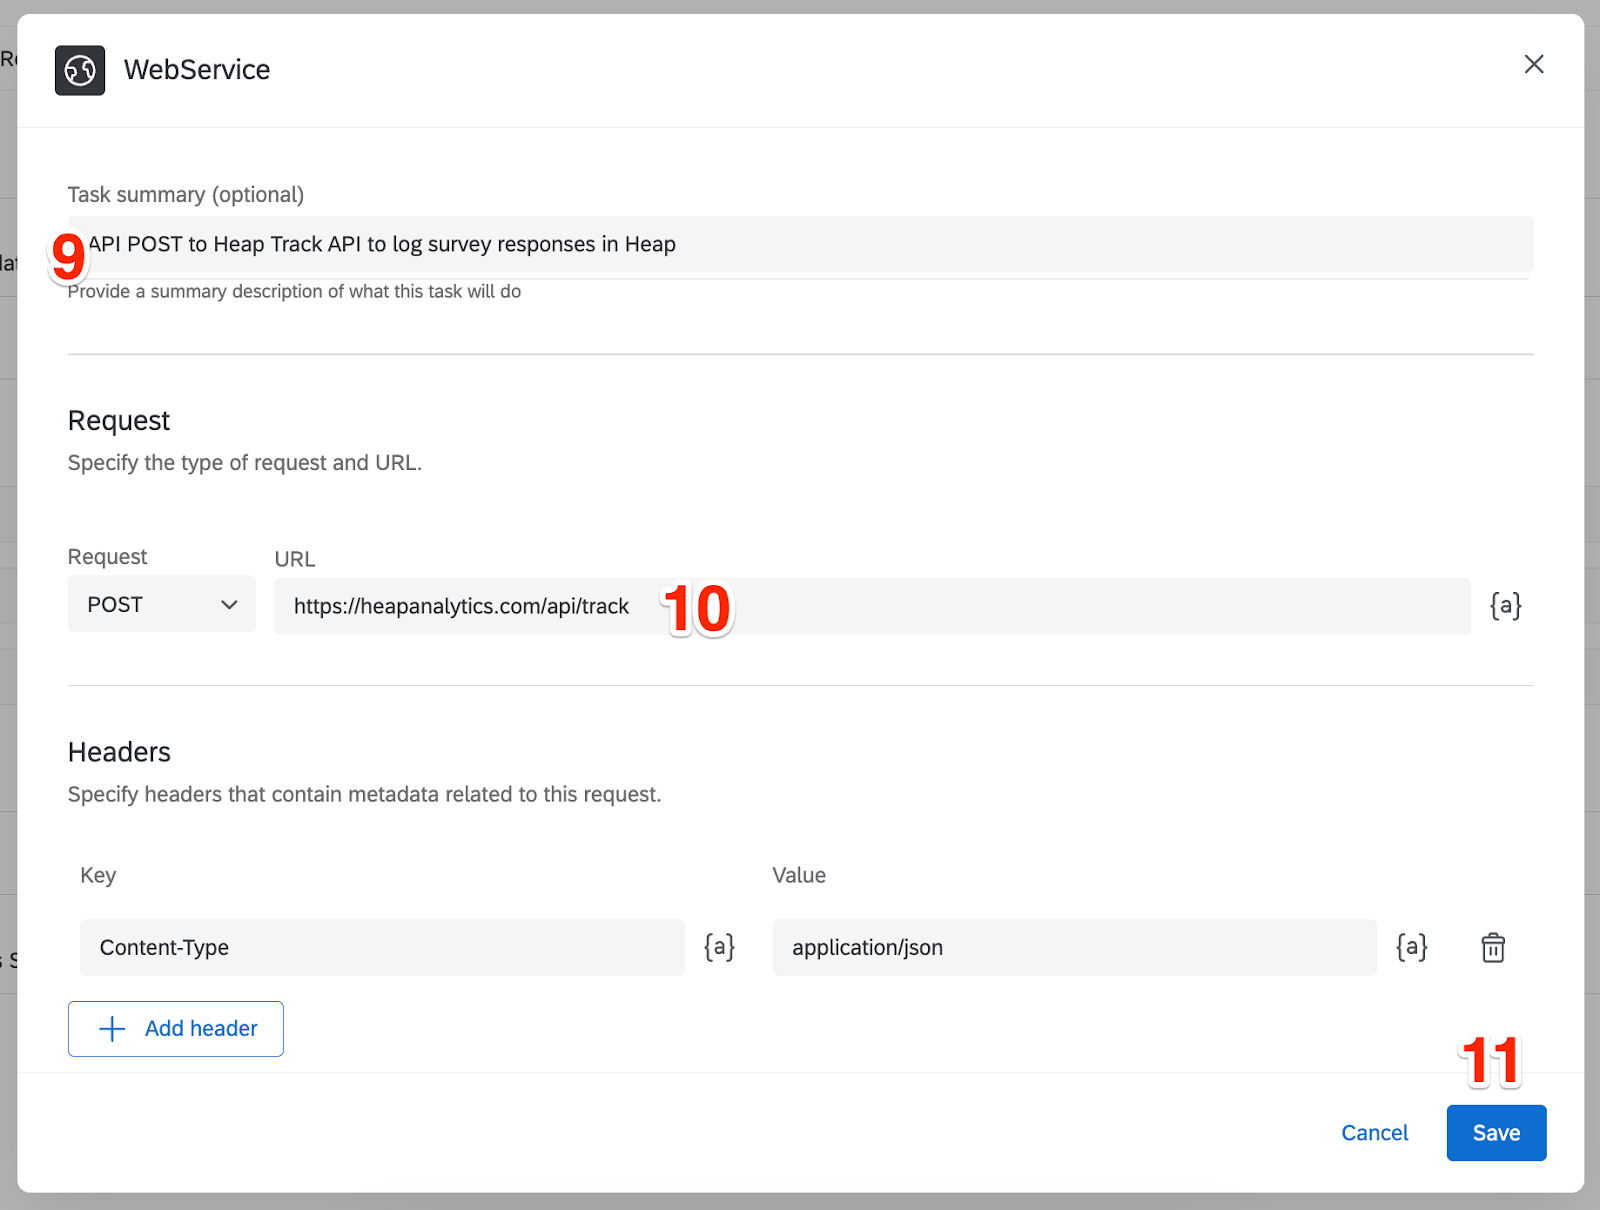
- Optionally, give your task a name like I’ve done in this example
- Select request type `POST` and the URL comes from the Heap Track API Docs (same as shown above for everyone)
- Keep the content type key value pair in the header as default
- Click Save
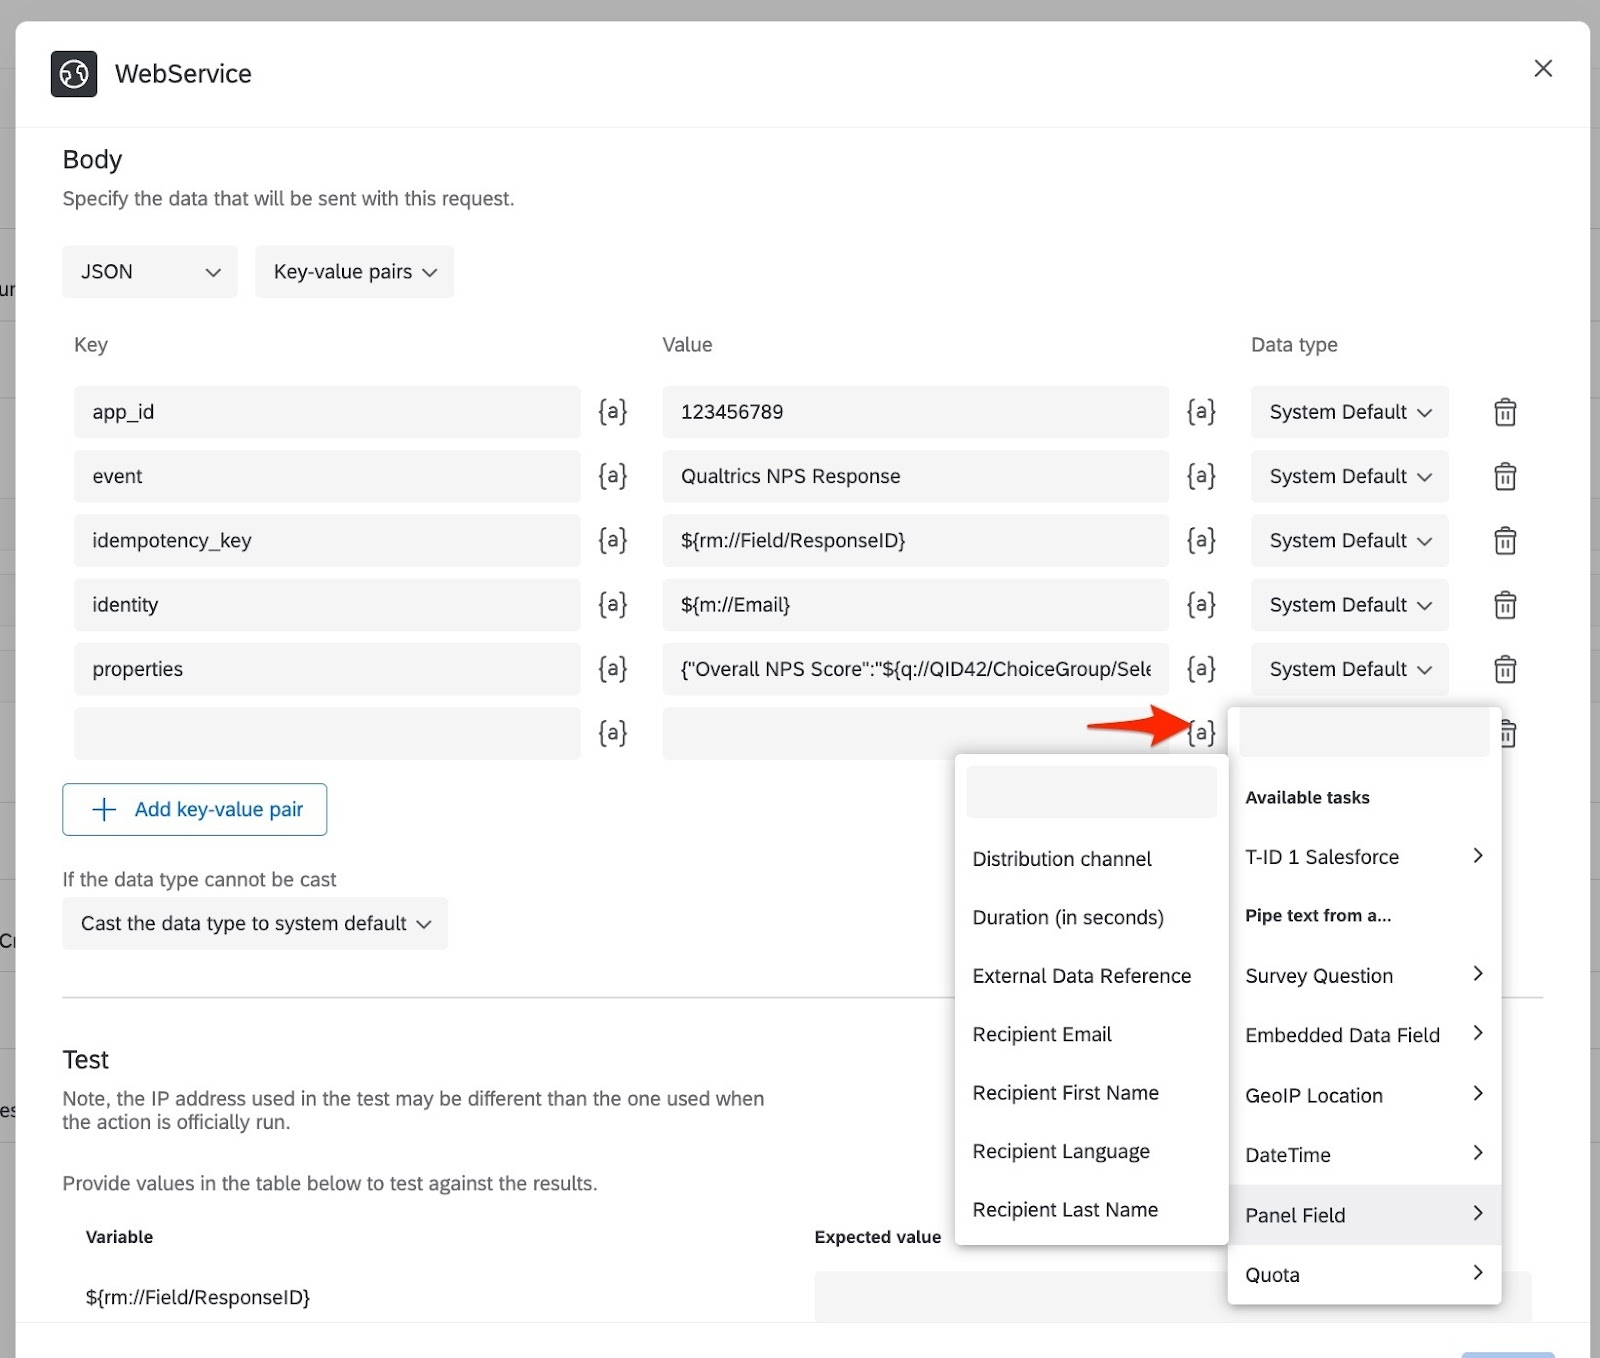
Configure the actual key value pairs with your survey content:


- Use JSON key value pair option
- Add pairs as needed, with at minimum the ones shown in 12 a-e above:
- a. This will be the same as your Heap App ID
- b. The name of the event that will show up in Heap - I suggest something like “Qualtrics NPS Response” or “Qualtrics Survey Response” - you can rename it later in Heap if you need to
- c. Identity will be the identifier that you use in Heap. In this example, email is used as the identifier and it’s pulling from the embedded data in Qualtrics
- d. idempotency_key - I suggest using the Response ID here - the purpose of this key is to ensure that if the API is called multiple times, you don’t end up with duplicates of the same response recorded in Heap and the Response ID should be unique in Qualtrics
- e. Properties - I will go into this below
- Properties: Configure your properties in a JSON Key-value pairs. The Qualtrics editor is clunky, so I suggest staring with a block like I’ve shared below and modify it as needed using a text editor or jsonformatter.io (prettify it to edit, then minify it before pasting it in to E).
{

   "Overall NPS Score": "${q://QID42/ChoiceGroup/SelectedChoices}",

   "Link to response": "${srr://SingleResponseReportLink?ttl=157784630}",

   "Product - NPS Score": "${q://QID1010/ChoiceGroup/SelectedChoices}",

   "Customer Success NPS": "${q://QID1008/ChoiceGroup/SelectedChoices}",

   "Education - NPS Score": "${q://QID1026/ChoiceGroup/SelectedChoices}",

   "Support NPS": "${q://QID1022/ChoiceGroup/SelectedChoices}",

   "Product - Ability to get valuable business insights quickly from Heap": "${q://QID1031/ChoiceGroup/SelectedAnswers/1}",

   "Product - Ease of learning user interface for new users": "${q://QID1031/ChoiceGroup/SelectedAnswers/4}",

   "Product - Quality of visualization options available in Heap": "${q://QID1031/ChoiceGroup/SelectedAnswers/33}",

   "Distribution Channel": "${e://Field/Q_CHL}",

   "Survey Name": "Heap NPS",

   "ResponseID": "${rm://Field/ResponseID}"

}

Test it out and see that it works (scroll down in the same config screen and you’ll be given the option to test it)
You can enter any test values here, but remember if you’re using your Response ID as the Idempotency Key, each time you want to test it, you need to change it, so if you test it multiple times makes it test1234 and test12345, etc.

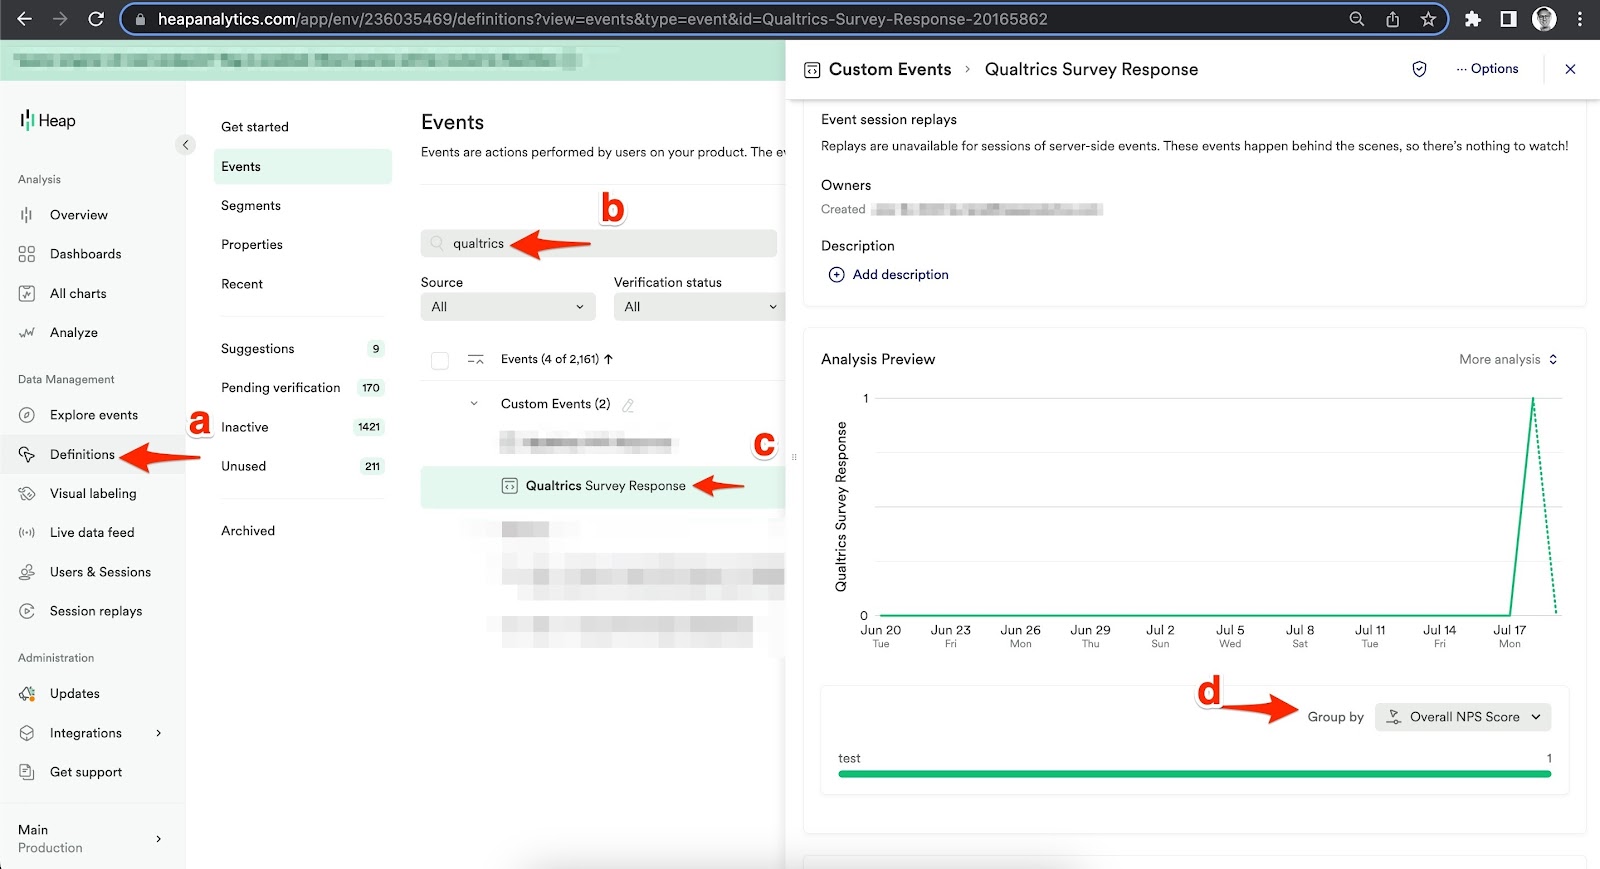
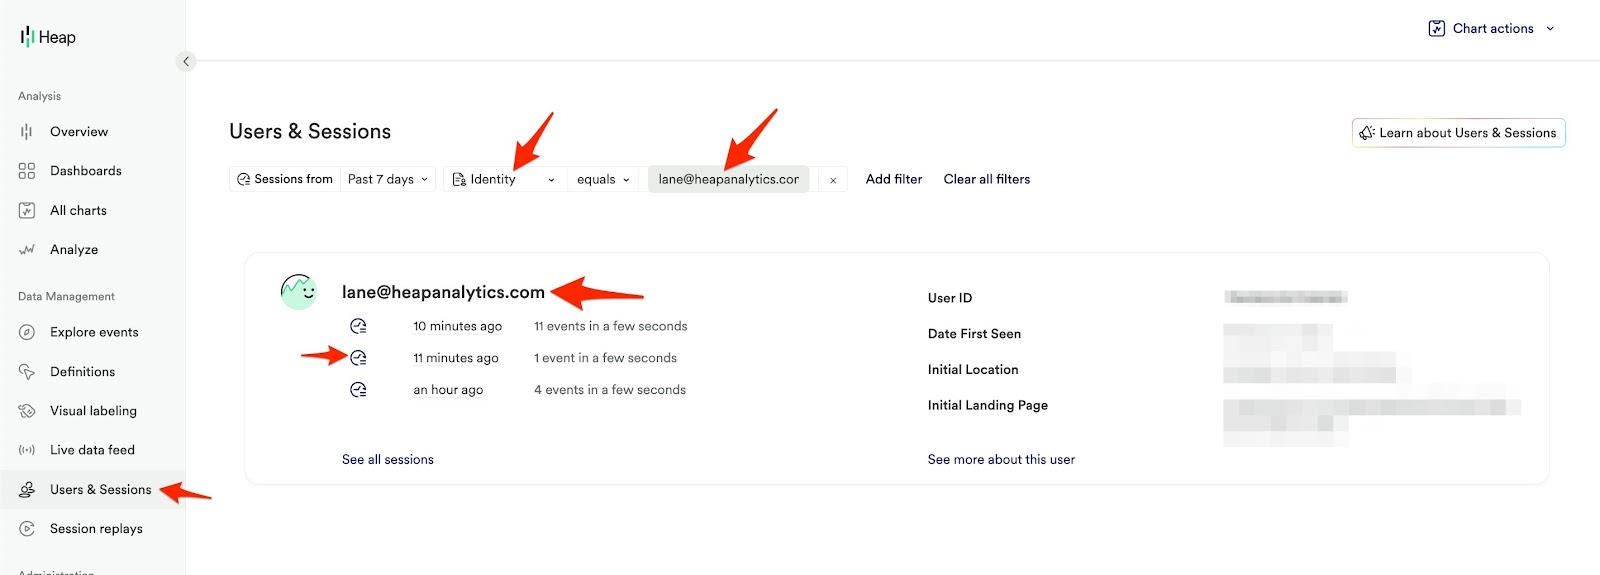
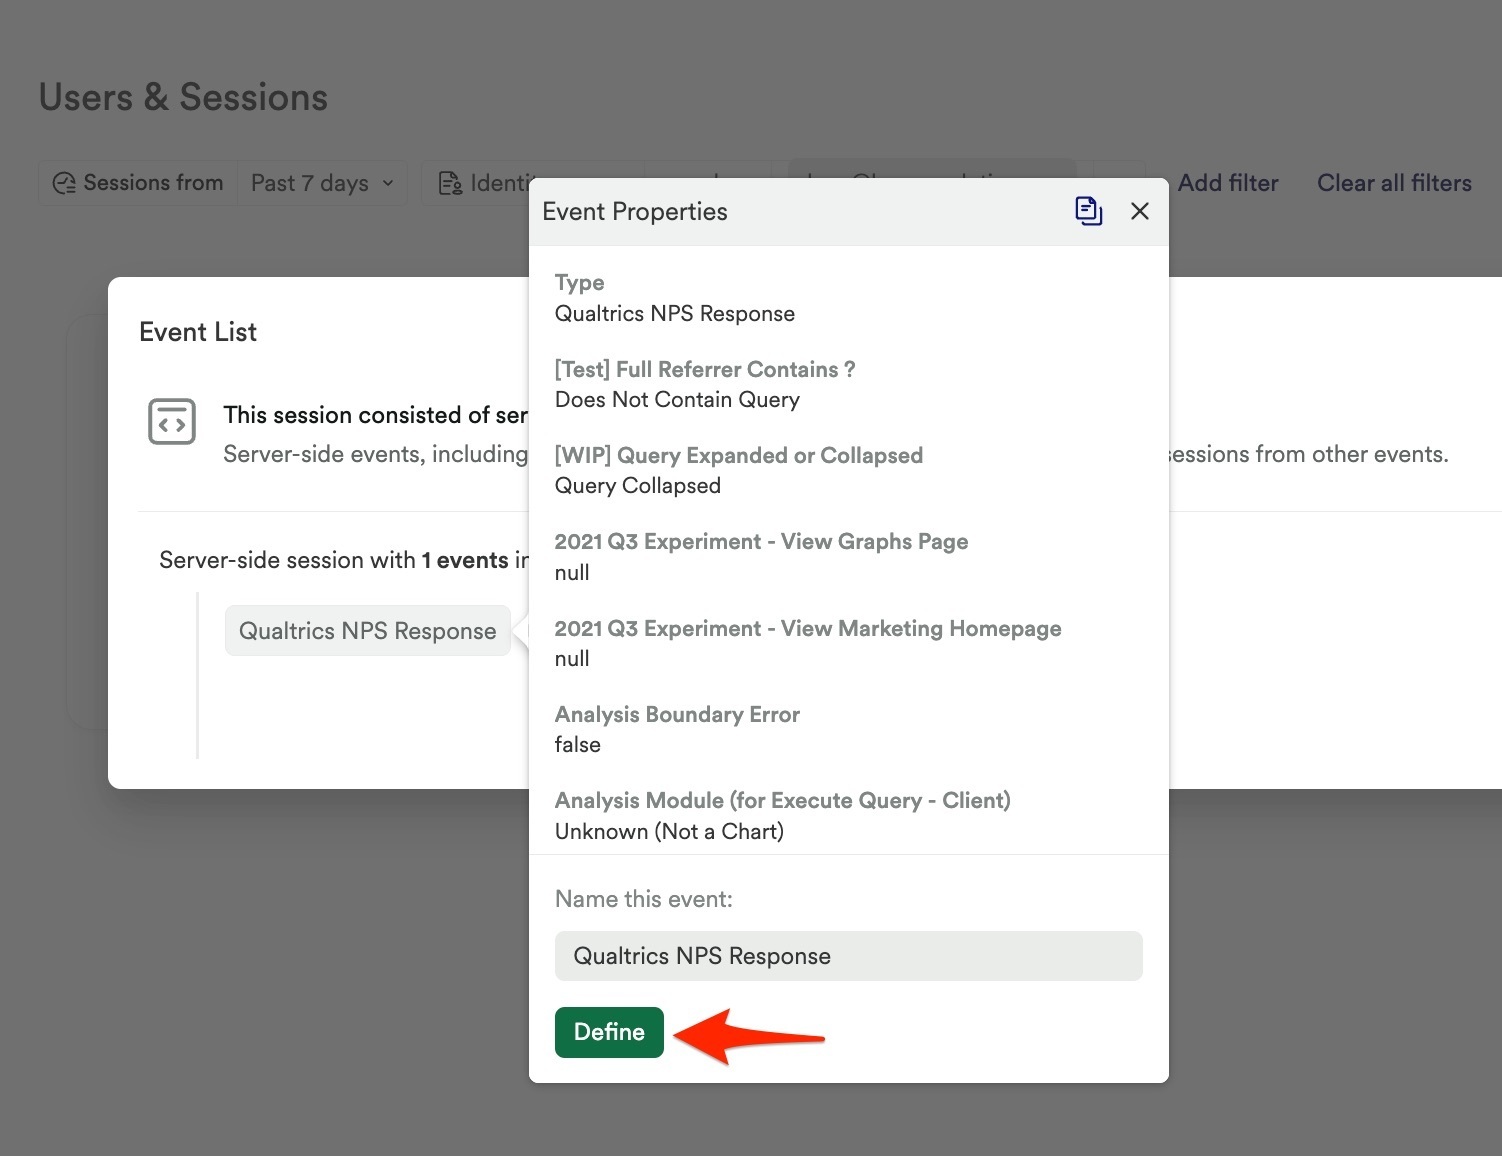
Once you get a positive response, go into Heap to make sure your response made it there, shown below with the arrows (probably obvious :-)
Define the event by clicking “Define” - this is where you have the opportunity to rename the event from what you’ve input in the Qualtrics Webservice if you need to.
Now head over to Definitions where you can check out the properties and further customize your event definition. In “D” you can group by various properties that you sent in if you want to further verify. At this point, your event is ready for analysis in Heap!